
QCoro
QCoro is a C++ library that makes it possible to use C++20 coroutines with Qt. It provides the necessary tools to create coroutines as well as coroutine-friendly wrappers for native Qt types.
QCoro is a C++ library that makes it possible to use C++20 coroutines with Qt. It provides the necessary tools to create coroutines as well as coroutine-friendly wrappers for native Qt types.

I have been contributing to KDE for over a decade. I was involved in KDE Telepathy, KScreen and most prominently in KDE PIM. I am Akonadi maintainer and author or Google integration.
A Rust crate for Cargo build scripts that provides a simple way to find and use CMake package installed on the system.

An extension for the VS Code IDE that provides documentation for Qt classes and methods when you hover over them in the editor.
I’m pleased to announce release 0.6.0 of QCoro, a library that allows using C++20 coroutines with Qt. This release brings several major new features alongside a bunch of bugfixes and improvements inside QCoro.
The four major features are:
🎉 Starting with 0.6.0 I no longer consider this library to be experimental (since clearly the experiment worked :-)) and its API to be stable enough for general use. 🎉
As always, big thank you to everyone who report issues and contributed to QCoro. Your help is much appreciated!
Unlike regular functions (or QCoro::Task<>-based coroutines) which can only ever
produce at most single result (through return or co_return statement), generators
can yield results repeatedly without terminating. In QCoro we have two types of generators:
synchronous and asynchronous. Synchronous means that the generator produces each value
synchronously. In QCoro those are implemented as QCoro::Generator<T>:
// A generator that produces a sequence of numbers from 0 to `end`.
QCoro::Generator<int> sequence(int end) {
    for (int i = 0; i <= end; ++i) {
        // Produces current value of `i` and suspends.
        co_yield i;
    }
    // End the iterator
}

int sumSequence(int end) {
    int sum = 0;
    // Loops over the returned Generator, resuming the generator on each iterator
    // so it can produce a value that we then consume.
    for (int value : sequence(end)) {
        sum += value;
    }
    return sum;
}
The Generator interface implements begin() and end() methods which produce an
iterator-like type. When the iterator is incremented, the generator is resumed to yield
a value and then suspended again. The iterator-like interface is not mandated by the C++
standard (the C++ standard provides no requirements for generators), but it is an
intentional design choice, since it makes it possible to use the generators with existing
language constructs as well as standard-library and Qt features.
You can find more details about synchronous generators in the QCoro::Generator<T>
documentation.
Asynchronous generators work in a similar way, but they produce value asynchronously,
that is the result of the generator must be co_awaited by the caller.
QCoro::AsyncGenerator<QUrl> paginator(const QUrl &baseUrl) {
  QUrl pageUrl = baseUrl;
  Q_FOREVER {
    pageUrl = co_await getNextPage(pageUrl); // co_awaits next page URL
    if (pageUrl.isNull()) { // if empty, we reached the last page
      break; // leave the loop
    }
    co_yield pageUrl; // finally, yield the value and suspend
  }
  // end the generator
}

QCoro::AsyncGenerator<QString> pageReader(const QUrl &baseUrl) {
  // Create a new generator
  auto generator = paginator(baseUrl);
  // Wait for the first value
  auto it = co_await generator.begin();
  auto end = generator.end();
  while (it != end) { // while the `it` iterator is valid...
    // Asynchronously retrieve the page content
    const auto content = co_await fetchPageContent(*it);
    // Yield it to the caller, then suspend
    co_yield content;
    // When resumed, wait for the paginator generator to produce another value
    co_await ++it;
  }
}

QCoro::Task<> downloader(const QUrl &baseUrl) {
  int page = 1;
  // `QCORO_FOREACH` is like `Q_FOREACH` for asynchronous iterators
  QCORO_FOREACH(const QString &page, pageReader(baseUrl)) {
    // When value is finally produced, write it to a file
    QFile file(QStringLiteral("page%1.html").arg(page));
    file.open(QIODevice::WriteOnly);
    file.write(page);
    ++page;
  }
}
Async generators also have begin() and end() methods which provide an asynchronous
iterator-like types. For one, the begin() method itself is a coroutine and must be
co_awaited to obtain the initial iterator. The increment operation of the iterator
must then be co_awaited as well to obtain the iterator for the next value.
Unfortunately, asynchronous iterator cannot be used with ranged-based for loops, so
QCoro provides QCORO_FOREACH macro to make using asynchronous generators simpler.
Read the documentation for QCoro::AsyncGenerator<T> for more details.
The QCoroWebSockets module provides QCoro wrappers for QWebSocket and QWebSocketServer
classes to make them usable with coroutines. Like the other modules, it’s a standalone
shared or static library that you must explicitly link against in order to be able to use
it, so you don’t have to worry that QCoro would pull websockets dependency into your
project if you don’t want to.
QCoro::Task<> ChatApp::handleNotifications(const QUrl &wsServer) {
  if (!co_await qCoro(mWebSocket).open(wsServer)) {
    qWarning() << "Failed to open websocket connection to" << wsServer << ":" << mWebSocket->errorString();
    co_return;
  }
  qDebug() << "Connected to" << wsServer;

  // Loops whenever a message is received until the socket is disconnected
  QCORO_FOREACH(const QString &rawMessage, qCoro(mWebSocket).textMessages()) {
    const auto message = parseMessage(rawMessage);
    switch (message.type) {
      case MessageType::ChatMessage:
        handleChatMessage(message);
        break;
      case MessageType::PresenceChange:
        handlePresenceChange(message);
        break;
      case MessageType::Invalid:
        qWarning() << "Received an invalid message:" << message.error;
        break;
    }
  }
}
The textMessages() methods returns an asynchronous generator, which yields the message
whenever it arrives. The messages are received and enqueued as long as the generator
object exists. The difference between using a generator and just co_awaiting the next
emission of the QWebSocket::textMessage() signal is that the generator holds a connection
to the signal for its entire lifetime, so no signal emission is lost. If we were only
co_awaiting a singal emission, any message that is received before we start co_awaiting
again after handling the current message would be lost.
You can find more details about the QCoroWebSocket and QCoroWebSocketSever
in the QCoro’s websocket module documentation.
You can build QCoro without the WebSockets module by passing -DQCORO_WITH_QTWEBSOCKETS=OFF
to CMake.
The task.h header and it’s camelcase variant Task been deprecated in QCoro 0.6.0
in favor of qcorotask.h (and QCoroTask camelcase version). The main reasons are to
avoid such a generic name in a library and to make the name consistent with the rest of
QCoro’s public headers which all start with qcoro (or QCoro) prefix.
The old header is still present and fully functional, but including it will produce a
warning that you should port your code to use qcorotask.h. You can suppress the warning
by defining QCORO_NO_WARN_DEPRECATED_TASK_H in the compiler definitions:
CMake:
add_compiler_definitions(QCORO_NO_WARN_DEPRECATED_TASK_H)
QMake
DEFINES += QCORO_NO_WARN_DEPRECATED_TASK_H
The header file will be removed at some point in the future, at latest in the 1.0 release.
You can also pass -DQCORO_DISABLE_DEPRECATED_TASK_H=ON to CMake when compiling QCoro
to prevent it from installing the deprecated task.h header.
The clang compiler is fully supported by QCoro since 0.4.0. This version of QCoro intruduces supports for clang-cl and apple-clang.
Clang-cl is a compiler-driver that provides MSVC-compatible command line options, allowing to use clang and LLVM as a drop-in replacement for the MSVC toolchain.
Apple-clang is the official build of clang provided by Apple on MacOS, which may be different from the upstream clang releases.
<chrono> include (#82)QCoroFwd header with forward-declarations of relevant types (#71)task.h header file in favor of qcorotask.h (#70)You can download QCoro 0.6.0 here or check the latest sources on QCoro GitHub.
If you are interested in learning more about QCoro, go read the documentation, look at the first release announcement, which contains a nice explanation and example or watch recording of my talk about C++20 coroutines and QCoro this years’ Akademy.
After another few months I’m happy to announce a new release of QCoro, which brings several new features and a bunch of bugfixes.
Task<T>Task<T>QThreadSometimes it’s not possible to co_await a coroutine - usually because you need to integrate with a 3rd party code
that is not coroutine-ready. A good example might be implementing QAbstractItemModel, where none of the virtual
methods are coroutines and thus it’s not possible to use co_await in them.
To still make it possible to all coroutines from such code, QCoro::Task<T> now has a new method: .then(),
which allows attaching a continuation callback that will be invoked by QCoro when the coroutine represented
by the Task finishes.
void notACoroutine() {
    someCoroutineReturningQString().then([](const QString &result) {
        // Will be invoked when the someCoroutine() finishes.
        // The result of the coroutine is passed as an argument to the continuation.
    });
}
The continuation itself might be a coroutine, and the result of the .then() member function is again a Task<R>
(where R is the return type of the continuation callback), so it is possible to chain multiple continuations
as well as co_awaiting the entire chain.
Task<T>Up until now each operation from the QCoro wrapper types returned a special awaitable - for example,
QCoroIODevice::read() returned QCoro::detail::QCoroIODevice::ReadOperation. In most cases users of QCoro do
not need to concern themselves with that type, since they can still directly co_await the returned awaitable.
However, it unnecessarily leaks implementation details of QCoro into public API and it makes it harded to return a coroutine from a non-coroutine function.
As of QCoro 0.5.0, all the operations now return Task<T>, which makes the API consistent. As a secondary effect,
all the operations can have a chained continuation using the .then() continuation, as described above.
Qt doesn’t allow specifying timeout for many operations, because they are typically non-blocking. But the timeout
makes sense in most QCoro cases, because they are combination of wait + the non-blocking operation. Let’s take
QIODevice::read() for example: the Qt version doesn’t have any timeout, because the call will never block - if
there’s nothing to read, it simply returns an empty QByteArray.
On the other hand, QCoroIODevice::read() is an asynchronous operation, because under to hood, it’s a coroutine
that asynchronously calls a sequence of
device->waitForReadyRead();
device->read();
Since QIODevice::waitForReadyRead() takes a timeout argument, it makes sense for QCoroIODevice::read()
to also take (an optional) timeout argument. This and many other operations have gained support for timeout.
QThreadIt’s been a while since I added a new wrapper for a Qt class, so QCoro 0.5.0 adds wrapper for QThread. It’s
now possible to co_await thread start and end:
std::unique_ptr<QThread> thread(QThread::create([]() {
    ...
});
ui->setLabel(tr("Starting thread...");
thread->start();
co_await qCoro(thread)->waitForStarted();
ui->setLabel(tr("Calculating..."));
co_await qCoro(thread)->waitForFinished();
ui->setLabel(tr("Finished!"));
.then() continuation for Task<T> (#39)QCoro::waitFor() getting stuck when coroutine returns synchronously (#46)Task<T> from all operations (#54)QThread (commit 832d931)Thanks to everyone who contributed to QCoro!
You can download QCoro 0.5.0 here or check the latest sources on QCoro GitHub.
If you are interested in learning more about QCoro, go read the documentation, look at the first release announcement, which contains a nice explanation and example or watch recording of my talk about C++20 coroutines and QCoro this years’ Akademy.
It took a few months, but there’s a new release of QCoro with some new cool features. This change contains a breaking change in CMake, wich requires QCoro users to adjust their CMakeLists.txt. I sincerely hope this is the last breaking change for a very long time.
Major highlights in this release:
This change mostly affects packagers of QCoro. It is now possible to install both Qt5 and Qt6 versions
of QCoro alongside each other without conflicting files. The shared libraries now contain the Qt version
number in their name (e.g. libQCoro6Core.so) and header files are also located in dedicated subdirectories
(e.g. /usr/include/qcoro6/{qcoro,QCoro}). User of QCoro should not need to do any changes to their codebase.
This change affects users of QCoro, as they will need to adjust CMakeLists.txt of their projects. First, depending on whether they want to use Qt5 or Qt6 version of QCoro, a different package must be used. Additionally, list of QCoro components to use must be specified:
find_package(QCoro5 REQUIRED COMPONENTS Core Network DBus)
Finally, the target names to use in target_link_libraries have changed as well:
QCoro::CoreQCoro::NetworkQCoro::DBusThe version-less QCoro namespace can be used regardless of whether using Qt5 or Qt6 build of QCoro.
QCoro5 and QCoro6 namespaces are available as well, in case users need to combine both Qt5 and Qt6
versions in their codebase.
This change brings QCoro CMake configuration system to the same style and behavior as Qt itself, so it should now be easier to use QCoro, especially when supporting both Qt5 and Qt6.
Until now, when the Clang compiler was detected, QCoro forced usage of LLVM’s libc++ standard library.
Coroutine support requires tight co-operation between the compiler and standard library. Because Clang
still considers their coroutine support experimental it expects all coroutine-related types in standard
library to be located in std::experimental namespace. In GNU’s libstdc++, coroutines are fully supported
and thus implemented in the std namespace. This requires a little bit of extra glue, which is now in place.
Thanks to everyone who contributed to QCoro!
You can download QCoro 0.4.0 here or check the latest sources on QCoro GitHub.
If you are interested in learning more about QCoro, go read the documentation, look at the first release announcement, which contains a nice explanation and example or watch recording of my talk about C++20 coroutines and QCoro this years’ Akademy.
Just about a month after the first official release of QCoro, a library that provides C++ coroutine support for Qt,
here’s 0.2.0 with some big changes. While the API is backwards compatible, users updating from 0.1.0 will have
to adjust their #include statements when including QCoro headers.
QCoro 0.2.0 brings the following changes:
The code has been reorganized into three modules (and thus three standalone libraries): QCoroCore, QCoroDBus and
QCoroNetwork. QCoroCore contains the elementary QCoro tools (QCoro::Task, qCoro() wrapper etc.) and coroutine
support for some QtCore types. The QCoroDBus module contains coroutine support for types from the QtDBus module
and equally the QCoroNetwork module contains coroutine support for types from the QtNetwork module. The latter two
modules are also optional, the library can be built without them. It also means that an application that only uses
let’s say QtNetwork and has no DBus dependency will no longer get QtDBus pulled in through QCoro, as long as it
only links against libQCoroCore and libQCoroNetwork. The reorganization will also allow for future
support of additional Qt modules.
The include headers in QCoro we a bit of a mess and in 0.2.0 they all got a unified form. All public header files
now start with qcoro (e.g. qcorotimer.h, qcoronetworkreply.h etc.), and QCoro also provides CamelCase headers
now. Thus users should simply do #include <QCoroTimer> if they want coroutine support for QTimer.
The reorganization of headers makes QCoro 0.2.0 incompatible with previous versions and any users of QCoro will
have to update their #include statements. I’m sorry about this extra hassle, but with this brings much needed
sanity into the header organization and naming scheme.
The documentation has been updated to reflect the reorganization as well as some internal changes. It should be easier to understand now and hopefully will make it easier for users to start with QCoro now.
Historically, certain types types which can be directly co_awaited with QCoro, for instance QTimer has their
coroutine support implemented differently than types that have multiple asynchronous operations and thus have
a coroutine-friendly wrapper classes (like QIODevice and it’s QCoroIODevice wrapper). In 0.2.0 I have unified
the code so that even the coroutine support for simple types like QTimer are implemented through wrapper classes
(so there’s QCoroTimer now)
You can download QCoro 0.2.0 here or check the latest sources on QCoro GitHub.
If you are interested in learning more about QCoro, go read the documentation, look at the first release announcement, which contains a nice explanation and example or watch recording of my talk about C++20 coroutines and QCoro this years’ Akademy.
I’m happy to announce first release of QCoro, a library that provides C++ coroutine support for Qt.
You can download QCoro 0.1.0 here or check the latest sources on QCoro GitHub.
I have talked about QCoro (and C++ coroutines in general) recently at KDE Akademy, you can view the recording of my talk on YouTube.
In general, QCoro provides coroutine support for various asynchronous operations provided by Qt. Since Qt doesn’t support coroutines by default, QCoro provides the necessary “glue” between native Qt types and the C++ coroutine machinery, making it possible to use Qt types with coroutines easily.
QCoro provides coroutine support for asynchronous operations of QIODevice, QNetworkReply, QProcess,
QDBusPendingReply, QTimer and more. Take a look at the documentation for detailed description and list
of all currently supported Qt types.
A brief example from our documentation that demonstrates how using coroutines makes handling asynchronous operations in Qt simpler:
This is a (simplified) example of how we do network requests with Qt normally, using signals and slots:
QNetworkAccessManager *manager = new QNetworkAccessManager(this);
QNetworkReply *reply = manager->get(url);
connect(reply, &QNetworkReply::finished, this,
        [this, reply]() {
            const auto data = reply->readAll();
            doSomethingWithData(data);
            reply->deleteLater();
        });
And this is the same code, written using C++ coroutines:
QNetworkAccessManager networkAccessManager;
QNetworkReply *reply = co_await networkAccessManager.get(url);
const auto data = reply->readAll();
doSomethingWithData(data);
reply->deleteLater();
The co_await keyword here is the key here: it asynchronously waits for the reply to finish. During the wait,
the execution returns to the caller, which could be the Qt event loop, which means that even if this code looks
synchronous, in fact it won’t block the event loop while keeping the code simple to read and understand.
Recently my 4 year-old stepson saw a kid with an RC racing car in a park. He really wanted his own, but with Christmas and his birthday still being a long way away, I decided to solve the “problem” by combining three things I’m really passionate about: LEGO, electronics and programming.
In this short series of blogs I’ll describe how to build one such car using LEGO, Arduino and a bit of C++ (and Qt, of course!).
Obviously, we will need some LEGO to build the car. Luckily, I bought LEGO Technic Mercedes Benz Arocs 3245 (40243) last year. It’s a big build with lots of cogs, one electric engine and bunch of pneumatics. I can absolutely recommend it - building the set was a lot of fun and thanks to the Power Functions it has a high play-value as well. There’s also fair amount of really good MOCs, especially the MOC 6060 - Mobile Crane by M_longer is really good. But I’m digressing here. :)
Mercedes Benz Arocs 3245 (40243) Mercedes Benz Arocs 3245 (40243)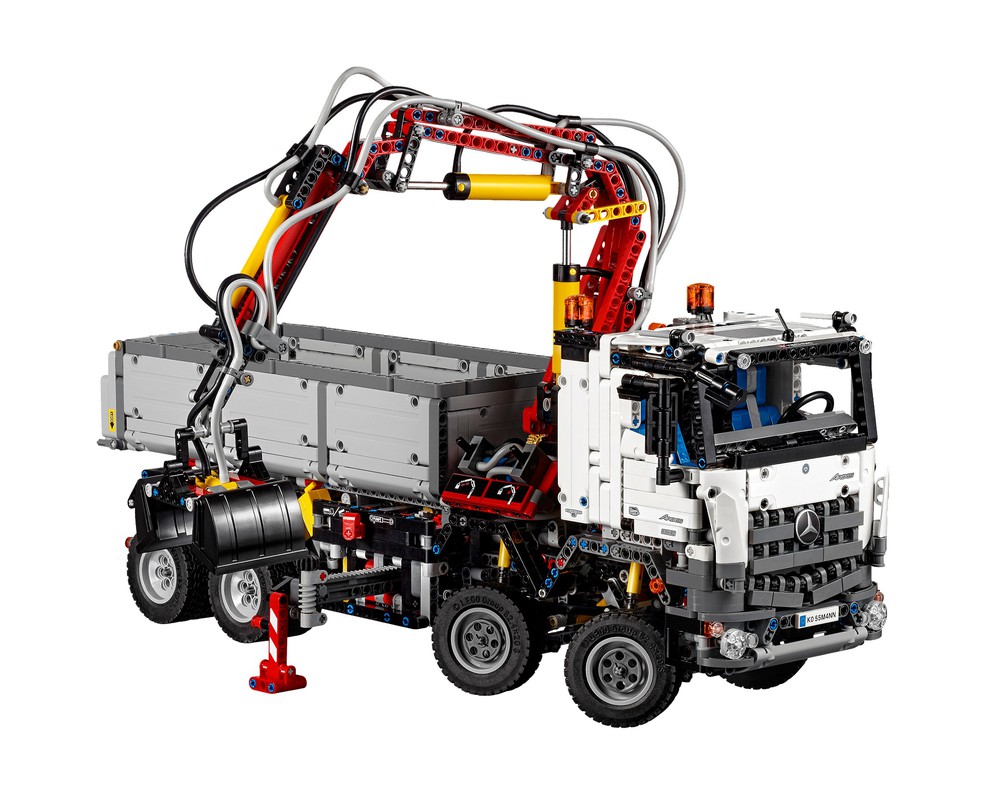

The problem with Arocs is that it only has a single Power Functions engine (99499 Electric Power Functions Large Motor) and we will need at least two: one for driving and one for steering. So I bought a second one. I bought the same one, but a smaller one would probably do just fine for the steering.
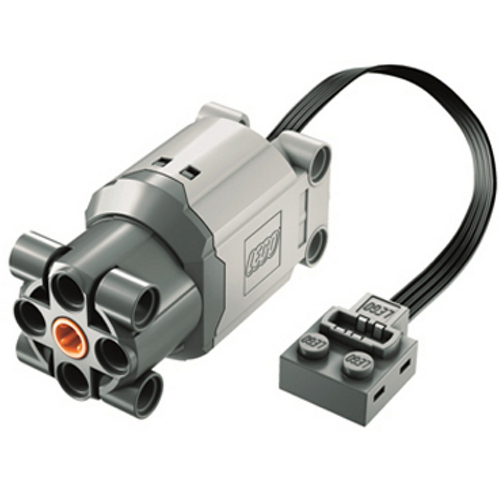
LEGO Power Functions engine (99499)
I started by prototyping the car and the drive train, especially how to design the gear ratios to not overload the engine when accelerating while keeping the car moving at reasonable speed.
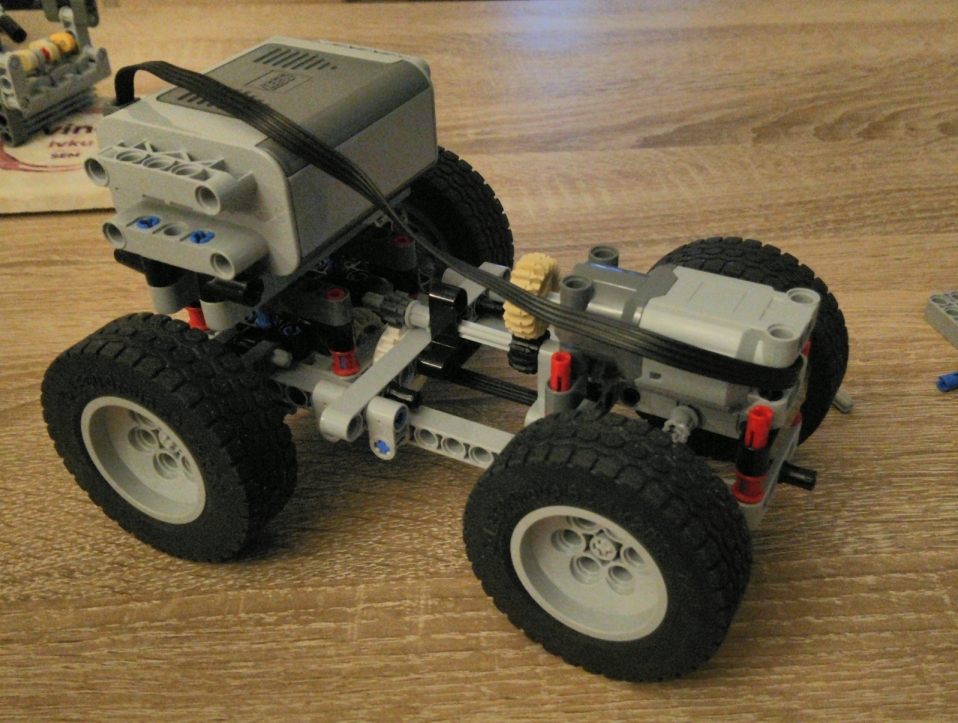
First prototype of engine-powered LEGO car
Turns out the [76244 Technic Gear 24 Tooth Clutch][lego-part-76244] is really important as it prevents the gear teeth skipping when the engine stops suddenly, or when the car gets pushed around by hand.
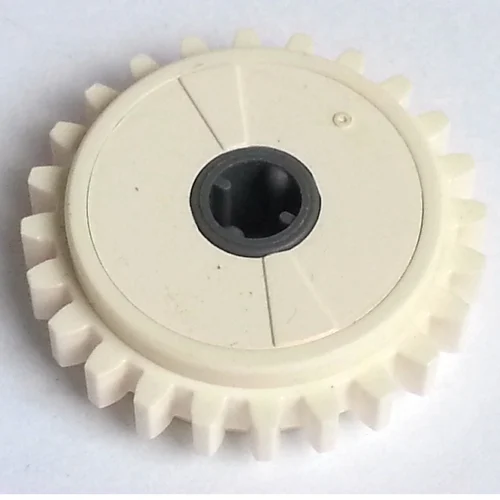
76244 Technic Gear 24 Tooth Clutch
Initially I thought I would base the build of the car on some existing designs but in the end I just started building and I ended up with this skeleton:

Skelet of first version of the RC car
The two engines are in the middle - rear one powers the wheels, the front one handles the steering using the 61927b Technic Linear Actuator. I’m not entirely happy with the steering, so I might rework that in the future. I recently got Ford Mustang (10265) which has a really interesting steering mechanism and I think I’ll try to rebuild the steering this way.
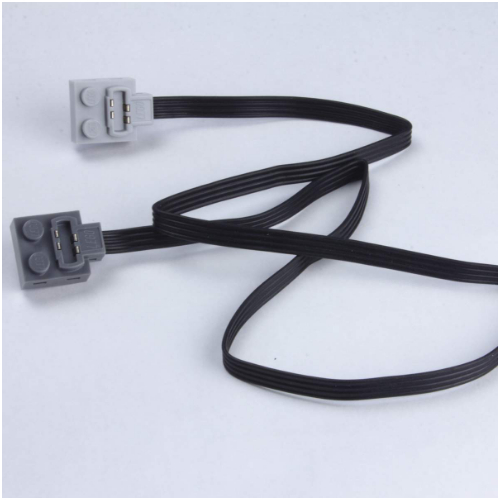
We will control the engines from Arduino. But how to connect the LEGO Power Functions to an Arduino? Well, you just need to buy a bunch of those 58118 Electric Power Functions Extension Wires, cut them and connect them with DuPont cables that can be connected to a breadboard. Make sure to buy the "with one Light Bluish Gray End" version - I accidentally bought cables which had both ends light bluish, but those can't be connected to the 16511 Battery Box.
We will need 3 of those half-cut PF cables in total: two for the engines and one to connect to the battery box. You probably noticed that there are 4 connectors and 4 wires in each cable. Wires 1 and 4 are always GND and 9V, respectively, regardless of what position is the switch on the battery pack. Wires 2 and 3 are 0V and 9V or vice versa, depending on the position of the battery pack switch. This way we can control the engine rotation direction.

For the two cables that will control the engines we need all 4 wires connected to the DuPont cable. For the one cable that will be connected to the battery pack we only need the outter wires to be connected, since we will only use the battery pack to provide the power - we will control the engines using Arduino and an integrated circuit.
I used the glue gun to connect the PF wires and the DuPont cables, which works fairly well. You could use a solder if you have one, but the glue also works as an isolator to prevent the wires from short-circuiting.

This completes the LEGO part of this guide. Next comes the electronics :)
To remotely control the car we need some electronics on board. I used the following components:
The total price of those components is about €30, which is still less than what I paid for the LEGO engine and PF wires.
Let’s start with the Bluetooth module. There are some really nice guides online how to use them, I’ll try to describe
it quickly here. The module has 4 pins: RX, TX, GND and VCC.
GND can be connected directly to Arduino’s GND pin. VCC is power supply for the
bluetooth module. You can connect it to the 5V pin on Arduino. Now for TX and RX
pins. You could connect them to the RX and TX pins on the Arduino board, but that makes it
hard to debug the program later, since all output from the program will go to the bluetooth module rather than our
computer. Instead connect it to pins 2 and 3. Warning: you need to use a voltage
divider for the RX pin, because Arduino operates on 5V, but the HC-06 module operates on 3.3V. You can
do it by putting a 1kΩ resistor between Arduino pin 3 and HC-06 RX and 2kΩ resistor between
Arduino GND and HC-06 RX pins.
Next comes up the L293D integrated circuit. This circuit will allow us to control the engines. While in theory we could hook up the engines directly to the Arduino board (there’s enough free pins), in practice it’s a bad idea. The engines need 9V to operate, which is a lot of power drain for the Arduino circuitry. Additionally, it would mean that the Arduino board and the engines would both be drawing power from the single 9V battery used to power the Arduino.
Instead, we use the L293D IC, where you connect external power source (the LEGO Battery pack in our case) to it as well as the engines and use only a low voltage signal from the Arduino to control the current from the external power source to the engines (very much like a transistor). The advantage of the L293D is that it can control up to 2 separate engines and it can also reverse the polarity, allowing to control direction of each engine.
Here’s schematics of the L293D:

L293D Schematics
To sum it up, pin 1 (Enable 1,2) turns on the left half of the IC, pin 9 (Enable 3,4) turns
on the right half of the IC. Hook it up to Arduino's 5V pin. Do the same with pin 16 (VCC1), which powers
the overall integrated circuit. The external power source (the 9V from the LEGO Battery pack) is connected to
pin 8 (VCC2). Pin 2 (Input 1) and pin 7 (Input 2) are connected to Arduino and
are used to control the engines. Pin 3 (Output 1) and pin 6 (Output 2) are output pins that
are connected to one of the LEGO engines. On the other side of the circuit, pin 10 (Input 3) and
pin 15 (Input 4) are used to control the other LEGO engine, which is connected to pin 11 (Output 3)
and pin 14 (Output 4). The remaining four pins in the middle (4, 5,
12 and 13 double as ground and heat sink, so connect them to GND (ideally both Arduino and
the LEGO battery GND).
Since we have 9V LEGO Battery pack connected to VCC2, sending 5V from Arduino to Input 1 and
0V to Input 2 will cause 9V on Output 1 and 0V on Output 2 (the engine will spin
clockwise). Sending 5V from Arduino to Input 2 and 0V to Input 1 will cause 9V to be on
Output 2 and 0V on Output 1, making the engine rotate counterclockwise. Same goes for the
other side of the IC. Simple!


I also built a LEGO casing for the Arduino board and the breadboard to attach them to the car. With some effort I could probably rebuild the chassis to allow the casing to “sink” lower into the construction.

The batterry packs (the LEGO Battery box and the 9V battery case for Arduino) are nicely hidden in the middle of the car on the sides next to the engines.


Now we are done with the hardware side - we have a LEGO car with two engines and all the electronics wired together and hooked up to the engines and battery. In the next part we will start writing software for the Arduino board so that we can control the LEGO engines programmatically. Stay tuned!
I’ve seen lots of posts like this in the past, never thought I’d be writing one myself.
I haven’t been very actively contributing to KDE for the past months. It’s been rather frustrating, because I felt like I have to contribute something, fix some bugs, finish some feature…but whenever I had the time to work on PIM, I just couldn’t bring myself to do anything. Instead I found myself running away to other projects or just playing games.
It took me a while to realize that the problem was that I was putting pressure on myself to contribute even though I did not feel like it. It turned from hobby and passion into a duty, and that’s wrong.
I think the main frustration comes from the feeling that I cannot innovate - I’m bound by various restrictions - libraries and languages I can use, APIs I must preserve/conform to, legacy behavior to not break anything for existing users… This has been taking away the fun. I have enough of this in my dayjob, thank you. So….
I decided to take a break from KDE PIM for a while. I’m sure I’ll be back at some point. But right now I feel like I gave it all I could and it’s still not where I’d like it to be and it’s no longer fun for me. What makes me very happy is the number of new contributors that have appeared over the past year or so.
Instead of hacking on KDE PIM I went back to some of my older projects - I improved Passilic, the Pass password manager frontend for Sailfish OS and revived my old Android app to sync Facebook events with Android calenar.
I also started playing with C++20 coroutines and how they could be used with Qt. The result is the QCoro library. I’ll blog about that soon and, hopefully, will talk about it in more depth in two months on Akademy (see, I’m not leaving completely 😉).
Finally, I spent the past week building a remote-controlled car using Lego, Arduino and a mobile app I wrote (with Qt, of course 😉). I’ll blog about that as well (spoiler alert: it’s fun!).
See y’all around!
/Dan
Plasma Pass, a Plasma applet for the Pass password manager version 1.2.0 is out.
The applet now supports OTP codes (in the format supported by the pass OTP plugin). The ‘clock’ icon appears next to all passwords, even those that do not have OTP code. This is a limitation caused by the passwords being stored in files encrypted and being decrypted only when the user requests it - so the applet cannot know whether there’s an OTP code available in the password file until you click on it. There were also some small fixups and UI improvements.
Tarball:
https://download.kde.org/stable/plasma-pass/plasma-pass-1.2.0.tar.xz
Checksum:
SHA-256: 01f0b03b99e41c067295e7708d41bbe581c0d73e78d43b50bf86b4699969f780
SHA-1:   07a32d21b0c4dd38cad9c800d7b8f463f42c39c6
Signature:
0ABDFA55A4E6BEA99A83EA974D69557AECB13683 Daniel Vrátil <dvratil@kde.org>
Feel free to report any issues or feature requests to KDE Bugzilla.

Following the post about what happened in KDE PIM in January and February let’s look into what the KDE PIM community has been up to in March and April. In total 38 contributors have made almost 1700 changes. Big thanks to everyone who helped us make Kontact better!
A new bundle of KDE applications has been released in April, including Kontact with its many bugfixes and improvements.
Every year in April the PIM team meets in Toulouse in France for a weekend of discussions and hacking. This year due to the coronavirus it wasn’t possible for us to meet so instead we held a virtual KDE PIM Sprint. You can read the sprint agenda as well as Volker’s report from the sprint.
To highlight some of the topics discussed
KMail has received its usual dose of bugfixes, mostly those:
There were some exciting improvements to KMail as well: Sandro Knauß has implemented support for Protected Headers for Cryptographic E-Mails. This means that we also send a signed/encrypted copy of headers and display the signed/encrypted headers if available and ignores the unsecure headers. Currently we don’t obfuscate the subject to not break current workflows. Those things will be improved later on. Sandro together with Thomas Pfeiffer get a funding from nlnet to improve mail encryption. That means there will be more improvement happen the next months. The next topic they will look at is to add Autocrypt support for KMail.
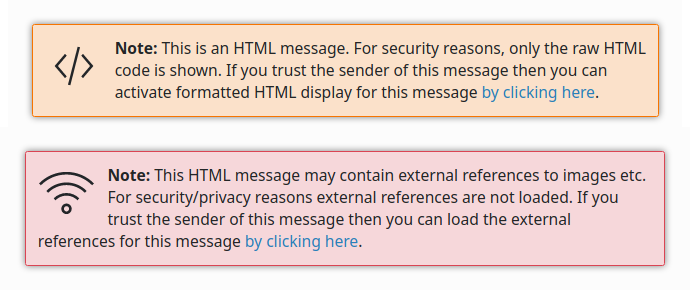
Volker has improved the look and feel of the “HTML Content” and “External References” warnings in emails.
As the Libre Avatar service has come back from the dead a while ago, so did now the support for it in KMail. The ‘Export to PDF’ feature which we introduced in the previous report has been polished (Daniel Vrátil, D27793).
The ‘Move To Trash’ code has been optimized so that deleting large amounts of emails should now be faster.
For developers it is now possible to open Chromium DevTools inside the message viewer pane to make it easier to debug message templates.
The Google Calendar and Google Contacts backends have been merged into a single Google Groupware resource (Igor Poboiko, D28560). The change should be mostly transparent to users, the old backends will be migrated to the new unified backend automatically after update. During this Igor also fixed various bugs and issues in the backends and the LibKGAPI library, big kudos to him!
The DAV resource is now able to synchronize the calendar color from KOrganizer to the DAV server (David Faure, D28938). Related to that, the menu to configure calendar color in KOrganizer has been simplified by removing the “Disable Color” action.
It is now easier to recognize and set the default calendar and the event editor now respects the settings correctly.
KJots, the note taking application, which has been on life support for 5 years, has received some love recently thanks to Igor Poboiko. Most of the things were happening under the hood: some ancient dusty code has been dropped, some refactoring happening, etc. However, if you still use KJots, you might also notice quite a number of changes too. And if you don’t, it’s a good time to consider using it :)
Igor has quite huge plans for the future of KJots. First of all, more bug squashing. Secondly: ability to store notes in Markdown format, synchronization with online services (thoughts are on OwnCloud/NextCloud, or proprietary Evernote). On a lesser scale, the port to the same text editing component as used by KMail email composer is being considered, which will give KJots more text-editing features. There are also plans to add a support for inline checkboxes introduced in Qt 5.14, which would allow making checklists and TODO-lists in KJots, and ability to sort books and pages by their modification date (so more relevant would pop up first).
Other parts of PIM has also received bugfixes and improvements. Kleopatra, the certificate management software, now displays GPG configuration tabs and option groups always in the same order (Andrey Legayev, T6446). A bug in Akregator has been fixed that could have caused some feeds to have an icon missing (David Faure, D28581). KAlarm has received a bunch of UI improvements as well as some smaller features - for instance it is now possible to import alarms from multiple calendars at once and the calendar list is now sorted by name (all by David Jarvie).
Lots of work went into modernizing Akonadi, the “backend” service for Kontact. One major change was switch to C++17 and some initial usage of C++17 features internally (public API is still C++11-compatible). Widgets for managing Tags have been improved and polished and the deprecated ItemModel and CollectionModel have been removed.
The KIMAP library has been optimized to better handle large message sets (Daniel Vrátil, D28944). The KLDAP library can now connect to LDAP server using SSL encryption (Tobias Junghans, D28915), alongside the existing TLS support.
Volker Krause has been working on preparing the KDAV library (which implements the DAV protocol) into KDE Frameworks.
Laurent Montel has been working throughout the entire PIM codebase, preparing it to port to Qt6, once it’s available.
Take a look at some of the junior jobs that we have! They are simple, mostly programming tasks that don’t require any deep knowledge or understanding of Kontact, so anyone can work on them. Feel free to pick any task from the list and reach out to us! We’ll be happy to guide you and answer all your questions. Read more here…
Following the post about what happened in KDE PIM in November and December by Volker, let’s look into what the KDE PIM community has been up to in the first two months of the new year. In total 23 contributors have made 740 changes.
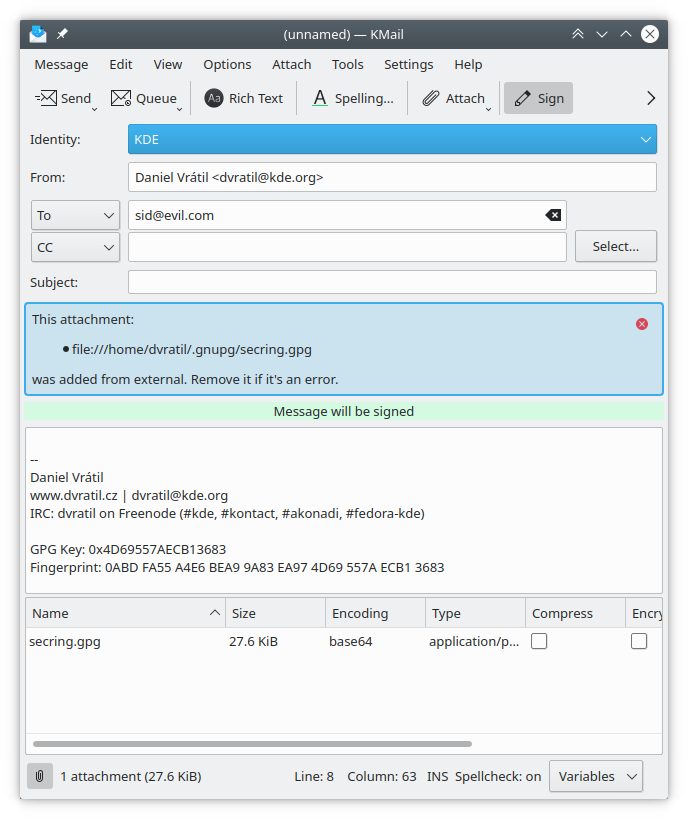
Laurent has been working on porting our code away from API that has been deprecated in Qt 5.15. Volker has been working on removing KDBusConnectionPool from all of KDE PIM.
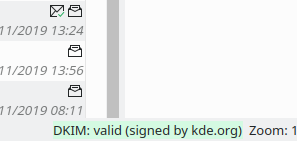
For network communication we now use some safer defaults - for example we enabled HSTS by default and we don’t allow redirects to less-safe protocols (i.e. from https:// to http://).
KMail and some other components have begun integrating KUserFeedback to provide some basic telemetry information about usage.
Take a look at some of the junior jobs that we have! They are simple, mostly programming tasks that don’t require any deep knowledge or understanding of Kontact, so anyone can work on them. Feel free to pick any task from the list and reach out to us! We’ll be happy to guide you and answer all your questions. Read more here…